Discover the Art of Live Performance: Where Creativity Meets Inspiration
Immerse yourself in a unique art experience with our Interactive Live Art Gallery, where the vibrant world of music and the captivating realm of painting converge. Our skilled artists, far more than mere vendors, transform your festival space into an interactive art exhibit, drawing guests into a world of creativity and conversation.
Our gallery showcases a diverse collection of original artwork, with pieces that cater to all tastes and budgets. From affordable prints to one-of-a-kind masterpieces, each item is a reflection of our artistic passion and dedication.
Since 2010, we have enhanced the atmosphere of hundreds of festivals, working in harmony with other vendors to create memorable experiences. Our commitment to art and community is evident in every event we participate in.
Choose our live painting option to add an extra layer of excitement to your event. Watch as our artists bring their canvases to life, creating a dynamic and engaging atmosphere that will captivate your audience.
For a more serene setting, opt for our standalone displays. These elegant presentations allow guests to appreciate the art at their own pace, adding a touch of tranquility to your festival.
To book our Live Art Gallery for your event, please provide us with the following details:
We look forward to bringing our artistic energy to your festival and creating an unforgettable experience for your guests.
Morphis Art brings a cool, artistic flair to events with our one-of-a-kind photo booths, featuring original artwork customized for each occasion. We’re all about adding a personal touch, offering not just the booth setup but also matching merchandise, all crafted with our signature artistic style. Plus, we handle everything – from custom artwork design to project management – making it a breeze for you. Our online community is buzzing too, with over 50,000 fans across our website and social channels, ready to spotlight your event.
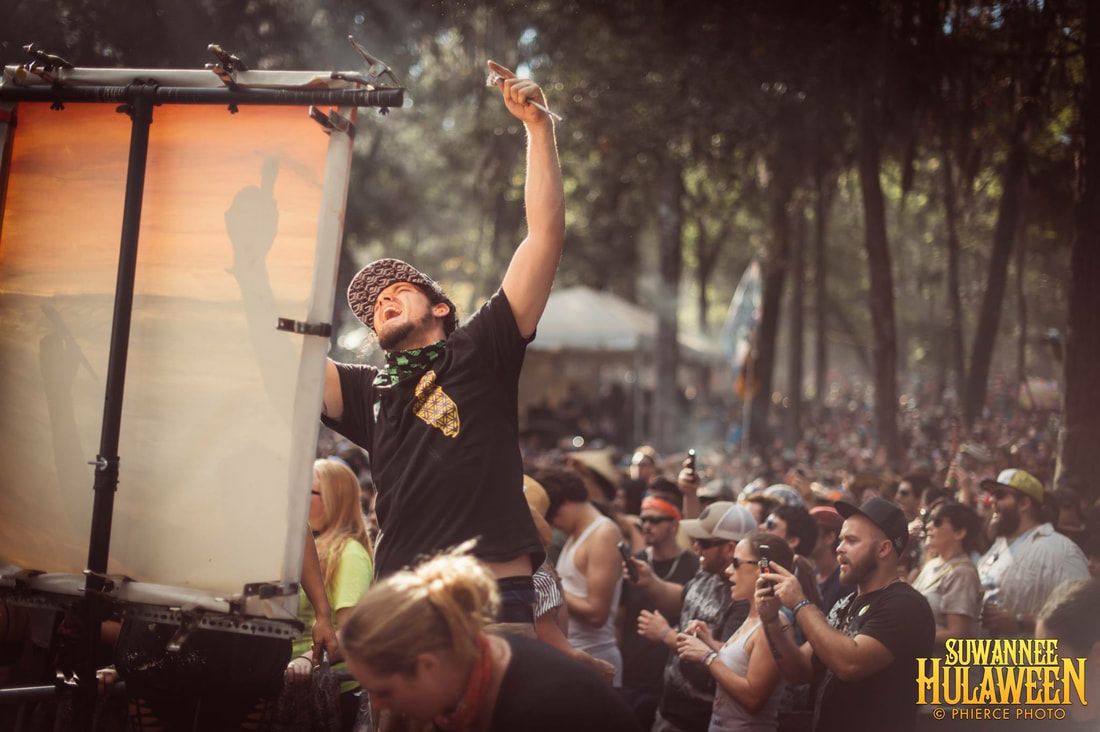
Day before event: Set up of Photo Booth (Prepare the Location, Assemble the Adjustable Stand, Attach Banner, Set Up the LED Lights, etc.)
During event: Management of Structure
Day after event: Breakdown (Safety Check, Final Adjustments, Test Shutdown, etc.)
Choose material and size that best suits your event. Event owns banner with rights to reuse every year.
Includes design review and selection of Photo Booth artwork, negotiation and contracts, artist/manufacturer communication and management, and travel and accommodations management.
Add any Logos/QR codes of your event/sponsors onto your custom banner for the photo booth! Cross-promotion through post on social media, our own email campaigns prior to the event, in-person at prior events, and listed on our tour dates schedule online.
Compensation if needed. Any difference between the value of Morphis Art offering and vending space and credentials cost.
Upon contact: Photo Booth options review and Merchandise selection. 90 days before the event: Photo Booth size & Merchandise Selection and Contracts Complete. 60 days before the event: Photo Booth & Merchandise Artwork Mock-Ups Due/Approved. Day before the event: Arrival On-Site to oversee prep.
Thank you for your time, we look forward to providing a beautiful space to add to your event. All terms negotiable.

Christopher Morphis is the artist behind Morphis Art, whose mission is to spread a positive message of mindfulness across the nation, through his artwork and live performance painting. He began painting live on tour in 2011 with world-famous musicians and at festivals that generally promote a positive message that he feels is in alignment with what he is looking to convey through the imagery in his art. Such messages are the power of meditation to open the mind, the power of positive thinking, and an attitude of gratitude. Inspiring the world to be a more mindfully balanced place is his main intention.
Prepare the Location: Choose a level spot for your photo booth. Ensure it’s near a power source and a high-traffic area.
Assemble the Stand: Follow specific instructions for the adjustable stand. Extend legs and frame to desired height and width. Ensure all locking mechanisms are securely in place.
Attach Top of Banner: Unroll the 10’ x 10’ banner. Attach to the stand, top side first. Use bungee ball ties in grommets (every 2ft) along all 4 sides.
Set Up the Lighting: Attach LED light fixtures to the top corners. Ensure they are securely fastened. Angle the lights to best illuminate the banner and the area in front.
Manage the Cords: Run cords from LED lights down the back of the stand. Use cable ties or clips to secure cords along the stand.
Extend & Secure the Stand: Extend the stand to its full height. Secure banner sides with grommets as you raise it. Place water-filled weights on each leg for stability.
Connect to Power: Plug LED light cords into the power strip. Connect the power strip to the extension cord. Run extension cord to the power source, ensuring safety.
Test Your Setup: Turn on LED lights to ensure everything works. Adjust light positioning if needed for the best photo quality.
Final Adjustments: Do a final check for stability and security. Make necessary adjustments for the best visual appeal.
Safety Check: Double-check cables and stability, especially in windy conditions.
Safety Check: Ensure the stand is stable and remove weights in windy conditions. Double-check and disconnect all cables to eliminate tripping hazards.
Final Adjustments: Remove adjustments made to the banner or lights. Ensure everything is detached and ready for disassembly.
Test Shutdown: Turn off the LED lights. Confirm all lights and electronics are powered down.
Disconnect from Power: Unplug LED light cords from the power strip. Disconnect the power strip from the extension cord. Safely coil the extension cord away from the photo booth area.
Retract & Secure the Stand: Lower the stand from its full height. Carefully remove banner sides from grommets as you lower the stand.
Manage the Cords: Remove cable ties or clips securing cords along the stand. Carefully gather cords from the LED lights at the back of the stand.
Remove Lighting: Detach LED light fixtures from the top corners. Ensure they are safely stored and protected.
Detach Banner: Carefully remove the 10’ x 10’ banner from the stand, starting from the top side. Roll up the banner for storage, ensuring it’s not creased or damaged.
Disassemble the Stand: Release all locking mechanisms on the stand. Carefully retract legs and frame to its compact size, following the reverse of the assembly instructions.
Prepare for Transport: Ensure the photo booth location is left clean and tidy. Pack all components securely for transportation.
Thank you for your time, we look forward to providing a beautiful space to add to your event. All terms negotiable.